
 Mentre la prima generazione di Google Chromebook con processore Intel della serie Atom in versione dual core N570 in grado di funzionare ad una frequenza di 1.66 GHz è già da diverso tempo disponibile, arrivano anche le proposte con soluzioni su processore della serie Core sempre di Intel.
Non solo, dal sito Hexxeh si propone anche una versione di Chrome OS su piattaforma MacBook Air; in effetti, sul sito si danno ampie spiegazioni su come installare il sistema operativo di casa Google anche sulle piattaforme Apple con l’unica pecca: il Bluetooth non è funzionante.
Se da una parte Google sta lavorando con Intel al fine di definire una possibile piattaforma che riesce a coniugare le serie Core di Intel con Chrome, dall’altra c’è chi pensa di sfruttare l’architettura della mela morsicata per inserire la tecnologia cloud di BigG.
In effetti, la cosa più interessante è, senza dubbio, la possibilità di sfruttare Chrome con tecnologia Apple. Gli amici di Hexxeh hanno approntato una guida abbastanza minuziosa che, insieme ad un modulo software che consentirebbe di assicurare questa migrazione, dovrebbe permettere a qualsiasi appassionato di apprezzare Chrome anche sulla piattaforma di Steve Jobs.
Al momento, la guida consentirebbe di lavorare con il modulo senza fili WiFi e sull’assieme grafico basato su Nvidia del MacBook Air. Tutto sommato il lavoro messo a disposizione dagli amici di Hexxeh è soddisfacente a meno di qualche inghippo del tutto trascurabile.
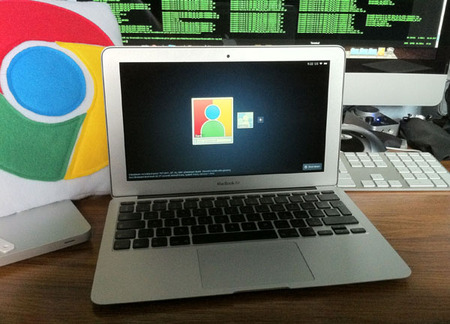
In effetti, dopo la sequenza di boot di circa 22 secondi e pigiando il tasto “C” della testiera si arriva a caricare Chrome
1. FINAL WARNING: You’re going to destroy all of your data by following this guide! I am not responsible for any data loss, make sure you backup your data first!
2. Download the install image from here
3. Extract the archive using your decompression tool of choice (The Unarchiver for Mac works great)
4. Burn the image to a USB stick using dd (check the wiki if you need help with this, same as Flow/Vanilla instructions)
5. Insert both this USB stick and the OS X install drive into your Macbook Air while it’s switched off
6. Hold the “C” key down and press the power button, you can let go of the “C” key once the Apple logo appears
7. Once the language selection screen appears, pick the appropriate option and click next
8. Once the install wizard appears, click Utilities on the bar at the top, and then Terminal
9. Type the following command without quotes: “umount /dev/disk*”
10. Type the following command without quotes: “dd if=/dev/rdisk1 of=/dev/rdisk0 bs=4m count=512″
11. Type the following command without quotes: “bless –device /dev/disk0s2 –setBoot –legacy”
12. Once it says it’s finished (basically when it says X bytes copied in Y seconds), hold down the power button until your machine switches off
13. Remove both your USB stick and the OS X install drive
14. Hit the power button, wait about 22 seconds
15. Enjoy